Monday, May 26, 2014

A HAPPY ACCIDENT

Happy Accidents really do happen.
After nearly a week off from work, I wanted to use up the leftover roasted chicken I made for munching during that week, and the chicken stock I had on hand after making that roasted chicken.  I roasted it with lots of herbs, lemons and salt and pepper.  It was really good in the Chicken Pasta Salad I ate all week, full of diced pears, dried cherries and lots of seasonings.    But there was still some chicken left, and that chicken  stock. 

So I pulled it all together in a soup pot and started raiding the vegetable drawer and the freezer.  A packet of frozen mashed cauliflower (it thickened my soup beautifully) a packet of frozen spaghetti squash, a few fresh carrots sliced up, a small zucchini diced up into smallish pieces, two spring onions from the garden, and 4 spears of asparagus picked this afternoon diced into small pieces.   Use up everything!

After I got it all into the pot and started stirring everything, I couldn't see the pieces of spaghetti squash.  ???  Where are they?  A minute or two of wondering what happened, I realized I had used a packet of coconut rice pudding I made about two or three months ago - not spaghetti squash!!  Well, the rice was certainly okay in the soup, but coconut and vanilla!!!  Ugh!  They were the same color and so sure of myself, I didn't label the packet they were in.  (Needless to say I was WRONG and I was NOT going to throw the whole thing out!

Coconut rice pudding in Chicken Soup! What a blunder!  But wait!  I know that Thai food uses a lot of coconut in its cuisine.  So I went in that direction.  I started adding lots of other ingredients.  Sesame oil, red pepper flakes, and I had some sheets of Nori - that stuff you use to wrap sushi rolls, and cut them up into small pieces and tossed into the pot as well.  Corn.  I found a packet of  corn cut from the cob that I froze last summer, so that went into the pot as well.  Sweet and savory!

So the whole point of today's blog is creativity!!  All I can say is that if you aren't afraid to experiment, disastrous mistakes can turn into very Happy Accidents~ ~

Saturday, May 17, 2014

Herb Pesto Pasta


After a long day in the garden and yard, I still felt like messin' up my kitchen when I came inside to find something to eat.   And while I write, I listen to "Into the Mystic" by Van Morrison.  A song that has haunted me now for several days.  One of those tunes you just can't get out of your head and maybe some of the best lyrics and music ever written.

Anyway, after cleaning up all the piles of yard waste I created, I was famished!!!! Ravenous!  I trimmed three big maple trees, several small trees and pulled tons of weeds!!  I was so busy I didn't think about eating, so when I came inside, all I could think about was eating!!!   A few final clean up chores outside took me to the herb garden and I decided then and there I would make an herbal pesto.  I had already picked several herbs that were in the fridge and didn't have any walnuts to make a traditional pesto of walnuts and basil.  So I used the herbs I had in the refrigerator and since I had no walnuts, I used some cashews I had on hand and some pumpkins seeds.  I toasted about a half cup of those while I washed and chopped herbs for the blender to make the pesto.   In the meantime, I cooked some penne pasta.
 
So here's what I did.  I combined all the herbs you see here: chives, oregano, basil and parsley, 4 cloves of garlic, a small chunk of parmesan, and a 1/2 c. of grated parmesan in the food processor.  When the nuts were toasted I put them in the blender too and blended everything until it made a beautiful paste with olive oil (about 1/2 c) a little lemon juice (maybe 1 or 2 T), salt and pepper. When the pasta was aldente, I drained it and put a serving into a bowl and mixed  about 3 T of the pesto into the bowl of pasta.     It was delicious with a small glass of white wine!    I can honestly say I may have preferred it to traditional basil pesto!
 
Pesto doesn't have to be just basil and walnuts!  Use whatever herbs you have on hand and whatever nuts you have on hand. Don't let traditional ingredients in a recipe stifle your imagination!   It's sure to turn out delish!

The leftovers were made into a pasta salad.  I poached two small turkey cutlets, cut them into slices and mixed them with the leftover pasta and some more pesto! 
 

Saturday, March 15, 2014

OYSTER MUSHROOM SOUP

Making herb blends is something I like to do and one of the ones I like the most is made with powdered dried mushrooms.  It's hard to find anything but dried shitakes around here so I shopped on line for a full one pound bag of dried Oyster Mushrooms.    I also ordered 8 oz. of dried Portabellas. 

Most of the dried mushrooms I buy get made into a powder using my spice grinder.  I keep a jar full of the powdered mushrooms on the shelf all the time.  I use it in all kinds of dishes: soups, meatloaf, eggs, salad dressings, and it's great on beef or chicken for roasting or coating veggies to roast.  The dried Oyster Mushrooms were delivered on Friday so I wanted to use some right away.  My first thought was mushroom soup.
Using dried mushrooms versus fresh makes for a much richer mushroom flavor.  The instructions on the package suggested rehydrating in boiling water for 15 - 20 minutes and at least 25 minutes of cooking time. My niece suggested soaking them overnight.  I'll try that next time. When I chopped my rehydrated mushrooms, I think I should have cut them smaller - small enough where you feel like you don't need to chew them.  They were a little tough but I must say I kind of enjoyed the chewiness.  They were kind of meaty.  So I decided that the recipe I provide will give you the option to puree the mushrooms for a silkier soup.  I didn't puree the mushrooms, but I think next time I will try it that way.  Then I'll sauté some sliced button mushrooms to add.
Here's the recipe.  Reading over the ingredients, I'd say this is a very healthy soup!

2 oz. dried oyster mushrooms (about 1 c) (any kind of dried mushroom will do)
2 c. boiling water
1 T. dried shallots (or use 1 small fresh shallot diced finely)
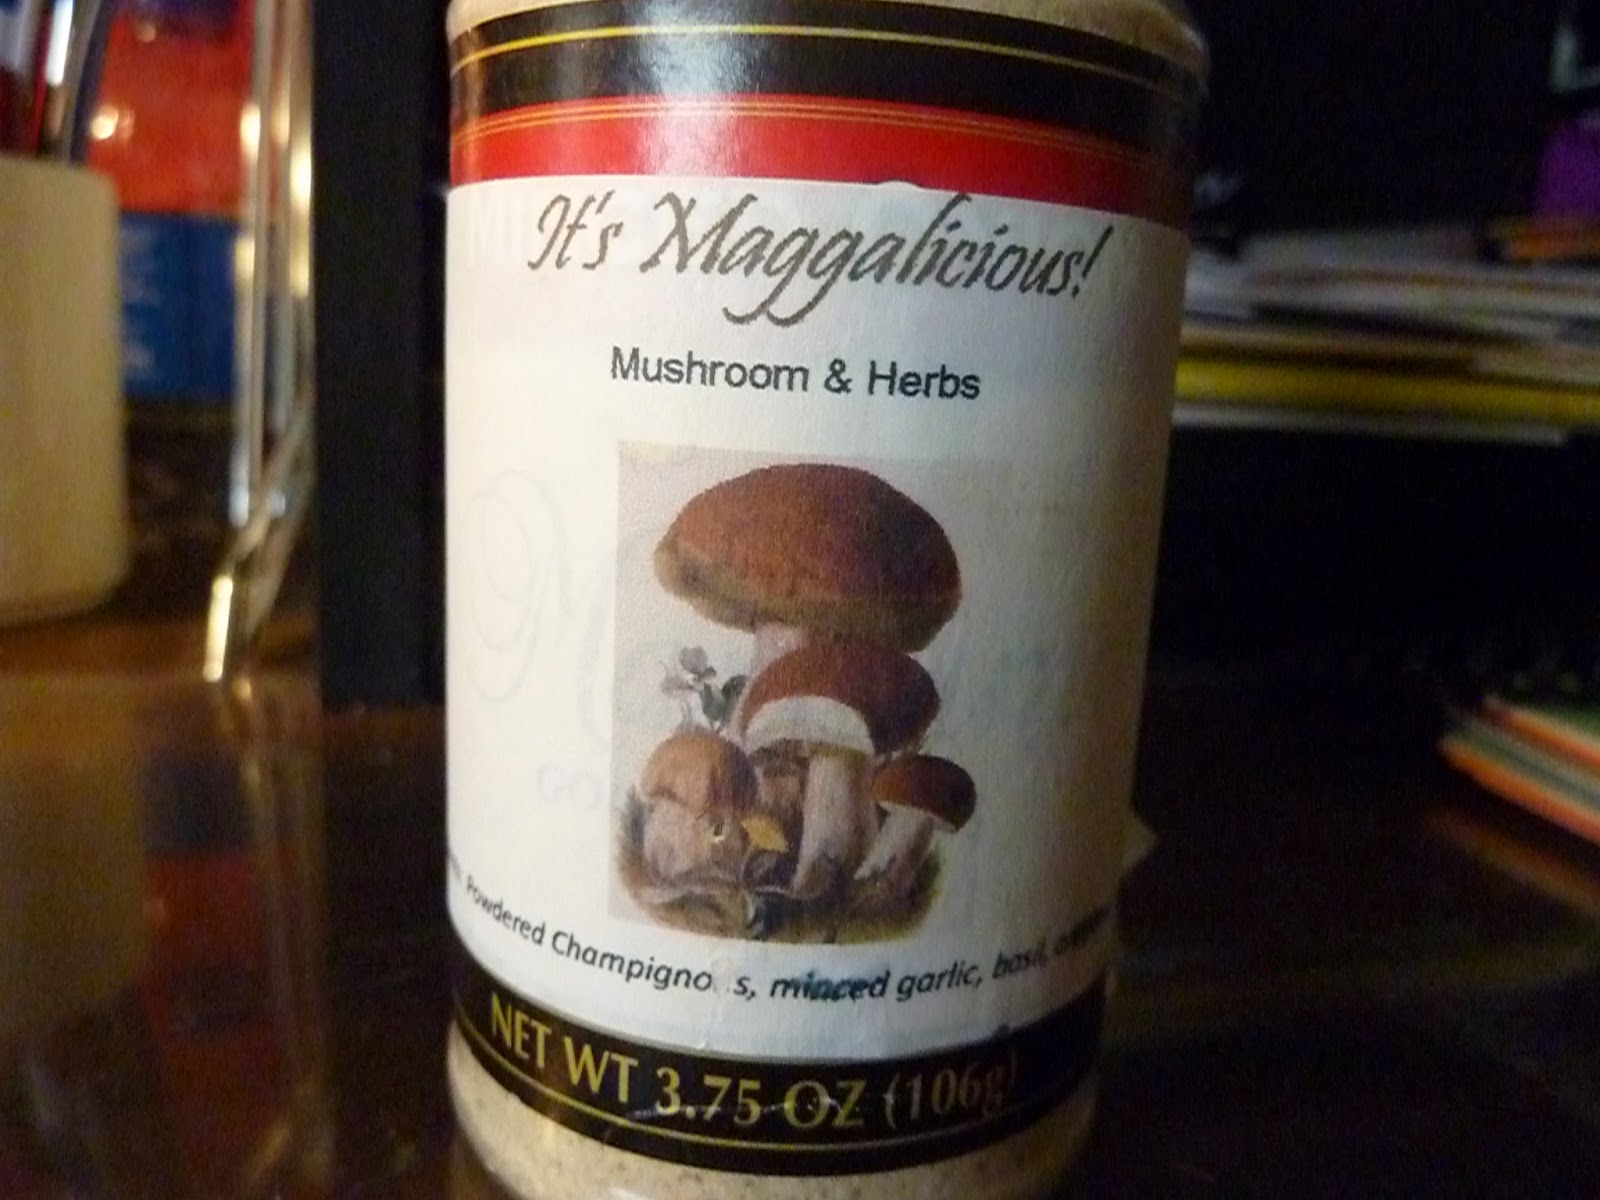
1 T. Maggalicious Mushroom and Herb Powder *
1 t. dried thyme
1 t. sea salt (or to taste)
2 c. beef stock (or water or vegetable stock can be used)
2 c. water
2/3 c cream or half and half, or fat free evaporated milk + 2T butter (I used the latter)
2 T rice flour (or regular)
2 - 3 T fresh chopped parsley (for garnish)
Sautéed sliced mushrooms (optional for garnish)

In a medium bowl, add the dried mushrooms and cover with boiling water.
Let stand for 15 - 20 minutes.
Remove the mushrooms with a slotted spoon, place in colander and rinse and drain well.
Pour the rehydration liquid from the mushrooms through a coffee filter or paper towel and add to a small soup pot.
Add the dried shallots, dried thyme, Maggaliscious Herb Mix* water and beef stock to the soup pot.
Set heat at medium low and let simmer.
Meanwhile chop all the rinsed and drained rehydrated mushrooms into very small pieces and add to the pot.

Let simmer for 30 minutes. **
Turn heat to medium.
Add the flour to a little water and mix well, pour into the pot. 
Let this come to a bubble to help thicken the soup a little.
Add the milk or cream and the butter if you are using fat free evaporated milk.
Let this simmer for at least 30 minutes.

** There are a couple of options here.  If you want the soup to be somewhat chunky
with mushrooms, leave it like it is.  Rehydrated mushrooms have a tendency to stay a little chewy though. If you want it to be silkier, use your stick blender, or your kitchen blender to puree most of the mushrooms in the soup.  Then you can always slice and sauté some button mushrooms to add to the soup.

*Maggalicious Dried Mushroom and Herb Seasoning Mix is a blend I mixed myself.  It contains powdered dried shitake mushrooms, dried basil, dried oregano, dried onions and dried  garlic, all blended together. So just add a few extra pinches of these herbs and spices to your soup.  If you are interested in a jar, let me know.  I also have blend for a pizza seasoning, and several flavored powdered sea salt blends.

Saturday, March 8, 2014

CHICKEN STROGANOFF WITH PRESERVED LEMON

I'm addicted.  And I didn't know how bad it was until two nights ago when I just had to do it again.  

I had already eaten my dinner. There were left overs in the refrigerator, but I just had to cook!!  Hi, my name is Maggie and I'm a cook-aholic. This is where I feed my addiction; on this little corner of countertop space and my stove top.

I cook every night.  Even if I don't eat it that same night, I want to cook when I  get home from work. I just can't help myself.  I suppose some of it is habit.  I spent more than half of my life married and always cooked dinner every night.  Friday night when I got home from work, I found the low fat pimento cheese spread I made in the refrigerator and some rice crackers, so I had a little cheese and crackers for dinner.  It was really good, but something was missing.  I wanted to cook.  So I set to looking at what ingredients I had in the fridge.  As soon as I opened the fridge door, I knew what I would make.  I had a package of chicken tenders, Greek yogurt, mushrooms, a box of chicken stock and a jar of preserved lemons that I made about a month ago.   My niece in California posted a recipe on FB she made using preserved lemons and I wanted to try it.  So she gave me her recipe for the lemons.  (That's another blog, or you can go to her blog http://www.chowbacca.com/2014/03/chicken-paprikash.html.  I think the  preserved lemon recipe is posted there).  When I made my lemons I used fairly large lemons so I cut them into quarters.  I used one piece in my recipe and after tasting, I decided to add a second piece. So much better!! Preserved lemons taste like lemons, of course, but they aren't sour or bitter.  Just intensely lemony.  They are "pickled" with salt, cinnamon sticks, bay leaves and pepper corns.

So the dish I saw when I looked around in the refrigerator was Chicken  Stroganoff with Preserved Lemons.  I gathered a few more ingredients:  garlic, shallot, salt, pepper.  Here's how I made it.

8 - 10 small chicken tenders
1 t. salt
2 T olive oil
10 - 12 mushrooms, sliced
1 small shallot, minced
2 cloves garlic, minced finely or pressed
2 pieces of preserved lemon, rinsed and cut into very thin strips
1 1/2 c. chicken stock
1 container of non fat Greek yogurt (you can use low fat or fat free sour cream)
1 T rice flour
Coarsely ground black pepper to taste

Lightly salt the tenders.

Slice the mushrooms and set aside.  Mince the shallot and set aside.  Mince or press the garlic and set aside.  Slice the lemon into very thin strips, turn them and cut across to make the strips a little shorter and set aside.  Measure the chicken stock, mix in the rice flour and set aside. Now you have everything ready.  It goes fast and it will only take a few minutes to put this together.

In a large skillet, over medium heat add the olive oil when the skillet is hot.  Add the tenders and sauté on one side only until they are lightly browned on that side.  Should take about 5 minutes all together.
Use a spatula to lift the tenders and turn over to let them cook for just a minute.  They don't have to be finished cooking yet.  Remove the tenders to a plate.

Add the mushrooms immediately to the same pan.  When they have cooked for a minute or two, add the shallots and garlic.  Cook until most of the liquid the mushrooms release has cooked away - probably 3 or 4 minutes.

Stir the rice flour in the chicken stock and add it to the mushroom mixture in the skillet.  Keep stirring over medium heat, add the lemon pieces and stir until the sauce thickens a bit.  If it gets too thick, add a little more chicken stock.
Turn the heat to low and add the yogurt and stir it in well. Be sure not to make the heat too high here, the yogurt will curdle.  If it does, don't worry.  It's not spoiled, it just looks different.  You can still eat it and it will still be delicious!  Add the tenders back to pan along with any juices that may have run out.  Let this sit on low heat for about 5 minutes to bring it all together and finish cooking the chicken.

It's done! A nice grind of black pepper and I ate mine with just a small piece of Nan - and Indian flat bread.  This would be delicious served over wide noodles, on a baked potato, or even over rice.  Steam a nice bunch of broccoli, asparagus or green beans to serve along with it. When you taste this, you'll understand a little better why I'm addicted to cooking.

Saturday, March 1, 2014

When It's Really, Really Cold ......


When it's really cold, colder than usual, even record breaking cold temps, there is nothing like a bowl of your favorite soup.  I make a lot of soup, and I've made many, many different kinds of soup.  I took a dish from my childhood, Chicken Paprikash, a Hungarian kind of stew, and turned it into a soup.  My own version of Olive Garden's Tuscan Sausage and Kale Soup and a silky pureed carrot soup with tarragon of my own creation for my vegetarian friends, are some of the stand outs.  Hmm, some day I should try and take an inventory of the different soups I've made over the years.

I used to do a monthly Soup Night October through March each year and invited approximately 30 people each month.  I did that for about 6 years.  I often made two kinds of soups for my guests.  One "featured" soup, and another for those who preferred a vegetarian bowl or weren't a fan of the "main" soup.  I love having people at the house and it was the perfect, casual, easy prep way to have as many people as I wanted.  I even had a "guest chef" a couple of times when someone else wanted to feature their own favorite soup recipe.

I came across this soup recipe about a year ago and I wanted to try it. It sounded like it would be really delicious and so comforting.  Sweet Corn and Chicken Soup.  I can't claim that it's my recipe, but I've made it often enough I don't need the recipe any more. The name of the soup is somewhat deceptive.  It's so much more that corn and chicken!  It's a recipe I found at Food Network TV from Arti Sequeria, and Indian girl, whose recipes are mostly Indian cuisine.  I don't know what drew me to the recipe, but it may have been all the ginger. It also has egg drop in it which I love! At the time I saw her make this on television, I had only recently discovered how much I loved fresh ginger in recipes.  So I set out to get what I needed to make it.  I made it on a Saturday afternoon because I could see it would take a while - a couple of hours to get it together because everything is from scratch.  It requires poaching chicken gently with warm and savory spices and vegetables.   Lots of sliced ginger perfumes the broth, and then more fresh grated ginger is added later.  


The recipes calls for canned cream corn.  Canned vegetables are not something I use much. Each season I buy several dozen ears of local sweet corn, blanch it and cut all the kernels off to freeze for the winter.  I thawed and slightly warmed some of the corn, added some of the stock from the simmering soup then used my stick blender to make my own creamed corn to add to the soup.   It's really the only change I've made to the recipe, unless I use chicken thighs instead of chicken breast.  Using chicken on the bone is essential to make a rich and hearty stock. The canned corned is perfectly acceptable if that's what you prefer to use.

One other note about the recipe at the site: As I read the instructions I noticed that it says to add the Ginger-Garlic Paste.  This ingredient is not on the ingredients list.  So I just pressed two cloves of garlic into the soup at the point where instructions said to add the ginger-garlic paste.   Tweek as you please, more ginger, more garlic, whatever you like.
So if you want to try this lovely soup, I have two pieces of advice.  Read the recipe all the way through since there are several steps and it helps to do them in order.  Secondly, make it when you have the time at home while you are doing other things.   If you like this soup as much as I do, you will feel like the time you spent making it is worth every minute.  This is the 5th time I've made it.  I never tire of it and I'll make it again and again.

Wednesday, January 22, 2014

THE PERFECT POACHED EGG

I've heard numerous tricks and tips about making the perfect poached egg.  Swirl the hot water so that the egg "comes in on itself" to stay together.  Add vinegar to the water because that helps to keep the egg together.  Take the water down to a  simmer before adding the eggs.  And in truth, there are only a few things that really count in making a perfect poached egg. 

Before I get into that, the proof is in the pudding.  Look at those two eggs in this picture.  I just made (and ate) those this morning.  I didn't use a form to keep them round.  And those little bits you see on the eggs are not pepper.    Before I made the eggs, I cooked two potatoes and diced them into a hot cast iron skillet with a little onion and browned them nicely.  I also cooked up two Sweet Italian Sausages in a small non stick skillet and diced those to add to the potatoes and onions.  I let them keep warm in the skillet while I made the eggs.  The following method may sound terribly labor intensive.  But that's only because I'm giving you so much information and detail.  I made these eggs in about 5 minutes.  One of the secrets to cooking eggs of any kind, is to take your time.  Eggs that are cooked too fast will not render perfect eggs.  Even scrambled eggs require slightly lower heat to keep them soft and fluffy, and fried eggs need lower heat to keep them from browning around the edges and getting leathery while the rest of the egg isn't cooked yet. 

The first secret to making beautiful poached eggs to buy FRESH eggs.  Fresh eggs have the quality of being more firm inside the shell.  The yolk and the white will both stand up high. You can see how high they stand in this photo and you can see it in the cooked eggs in the photo above, too.  An egg that isn't fresh will have a yolk that is relatively flat, and the white part will be flat and runny as well. 
Now, eggs that aren't "fresh" aren't bad eggs.  They have just lost some of the qualities that make a great poached egg.  You can test an egg for freshness by putting it into a glass of cold water.  If it sinks, it's fresh.  If it floats, it's not fresh.  Why? Well, because as the egg yolk and the white part break down, it creates an air pocket inside the shell - so it floats. Fresh eggs are more tasty, of course, and there are many dishes that would benefit from fresh eggs. But in my opinion the only time the freshness of an egg is really truly important, is when you want to poach it.  The firmness of the white part is what keeps the egg in good shape during the poaching process. By the way, some people like to store eggs on the counter or in the pantry, and that's ok.  Just use them up more quickly.  One day on the counter ages an egg as much as one week in the fridge. And don't use them for poaching.
I don't always  do this but this time I used the same skillet that I cooked the sausages in to make the eggs.  I just added enough water to fill the skillet.  The skillet is a smallish one, enough room in it to cook only two or three eggs.  When I filled the skillet with the water, naturally, the water was tinted with the browning that was left in the skillet from cooking sausages.  Plain water is fine too, but I wanted to cook the eggs in the sausage flavored water. If you don't have a non stick, just put a dab of butter in the bottom of the pan.  It will give some aid in removing the eggs from the pan later.

So that's the second secret.  Use a shallow pan and hopefully you have a lid for it.  Use any pan that will hold enough water to cover the eggs. Bring the water to a high boil, then turn it down to the lowest heat possible. Not simmering!  Wait until the water no longer has any boiling bubbles in it.  The movement of the water is what breaks apart the egg whites.  So once the water is no longer bubbling, crack your fresh egg into a small bowl, and the very carefully pour the egg into the water.  Do the same for each egg.  Now cover the pan.  Make sure the water doesn't boil again.  It will cook the outside too fast and stir up the whites making them fly all around the pan.  Let the eggs sit in this hot water for approximately 4 - 6 minutes.  This will render you a poached egg that has a cooked white and a slightly runny yolk.  Leave it in the water a minute less, or a minute more, depending on how well you like your eggs cooked.  Then just use a spoon that is large enough to lift the entire egg out of the pan.  Using a spoon too small will allow the egg to break off as it hangs over the edge of the spoon. A slotted spoon allows all the water to drain away.  Even a wooden spoon will work, just be sure to drain well.

So good luck making poached eggs.  Forget the vinegar, forget swirling the water, forget the small saucepan.  Use fresh eggs, a shallow pan with plenty of water in it, and simmering water (no bubbles).  Add a little patience to let the eggs cook gently, and you'll enjoy the healthiest way to prepare a delicious egg!

Friday, October 25, 2013

Everything Comes Together

Tonight's frost warning prompted me to pick the last of the basil leaves from my 5 plants as I got out of my car.  It will be a miracle if the plants aren't dead tomorrow.  So I plucked all the nice leaves off that didn't get frost bitten last night. You can see some of them already got nipped last night. When I came inside I decided I would have a cocktail tonight while I washed dishes.  I had some pre-mixed Cosmopolitans  so I shook one up with some ice.  I had purchased some Swiss cheese and ham on the way home along with a little box of Sesame flavored Melba toasts. 
When I got home, I realized I needed to make some more mayonnaise if I wanted a ham and cheese sandwich tomorrow for lunch.  So all these little incidences came together to make a nibble to have with my cocktail and this lovely little nibble was born. 
I had melba toast, fresh basil, Swiss cheese slices, and a mostly empty jar of home made mayonnaise.  A slice of Swiss cheese folded in three, placed on top of a melba toast that has just a tad of mayo scraped from the jar on it.  The cheese is also topped with a smear of mayo to "glue" the tiny or torn basil leaves that I used to top the cheese cracker.  Sounds really simple doesn't it?  It is!  And it was really, really good for a little nibble with a cocktail.  A tray full of them at a party would make a beautiful tray and  your guests will love these as a light, fresh tasting appetizer, with whatever your are serving as an aperitif! (I had three of them!) They would be wonderful with a red or a white wine, or even a glass of ginger ale!

These days you can buy fresh basil most times of the year at the grocery store.  Try these, you'll love them!  I'm off to make more mayonnaise!